• ***************************************************************************************
    WARNING: MAKE SURE YOUR EMAIL ADDRESS IS CURRENT IN THE MAIN ACCOUNT SETTINGS. TODAY WE WILL LIKELY FORCE NEARLY 1,000 USERS TO RE-VERIFY THEIR EMAIL ADDRESSES, AND THAT MEANS SOME PEOPLE WHO FAIL TO KEEP A CURRENT EMAIL ADDRESS ON RECORD HERE MAY GET LOCKED OUT.

    When people log into their account, we regularly check their passwords against a huge breach database. If it shows up in the database (regardless of whether you used the same password on another site or someone half way around world did), we make the password as breached and force you to change it. Unfortunately, due to a coding error, we marked a lot of accounts as having breached passwords even when they weren't in the database. Our easiest way of dealing with it while maintaining security is to force every affected account to re-verify their email address. Upon doing so, and then logging in again, the system will then check the password again and let you know if it still wants you to change it or not. If you get locked out fully, email [email protected] though note it may take a week or more for a response at this time.
    ***************************************************************************************

Chance's Mario Bros. Restoration

ChanceKJ

Well-known member
Joined
Nov 30, 2014
Messages
2,266
Reaction score
1,140
Location
Calgary, Alberta, Canada
21399218564_61f3c19aa0_o.jpg

I usually do most of my projects on the BYOAC, however slowly over the last two years in this hobby i've gradually shifted from once building my own cabinet now to a full restoration of an existing machine. All modestly aside, i feel i've become pretty damn good at building them, now its time to add the higher level of complexity that comes from the limitations of the original design of cabs that are older then me. I've already gotten a bit of a taste for a restoration with my Donkey Kong project over on the BYOAC, however that was more of a conversion. This next project will be a proper restoration. There is one minor caveat here, I live in Calgary and Winter is Coming. This will be a two part restoration, first will be as much of the non-cab cosmetic that i can do, then later a second part where i revitalize the Particle/Wood bits of the actual structure. Possibly not till spring.


Goals:
-A full factory fresh (or as close as i can) look and feel of the cab.
-Restoration using as many original NOS parts as possible. (Some concessions might be made for artwork and buttons.)
-Keep it playable as long as possible.
-Addition of a Braze HSS kit.

Design steps:
1. Planning, sourcing, materials (In Progress)
2. Mass purchase of materials
3. Restore the smaller components
4. Repair the damage to the cabinet structure
5. Paint the Cabinet
8. Beer & Video games

Resources:
-My BYOAC Nintendo Upright database thread: Here
-KLOV
-Google
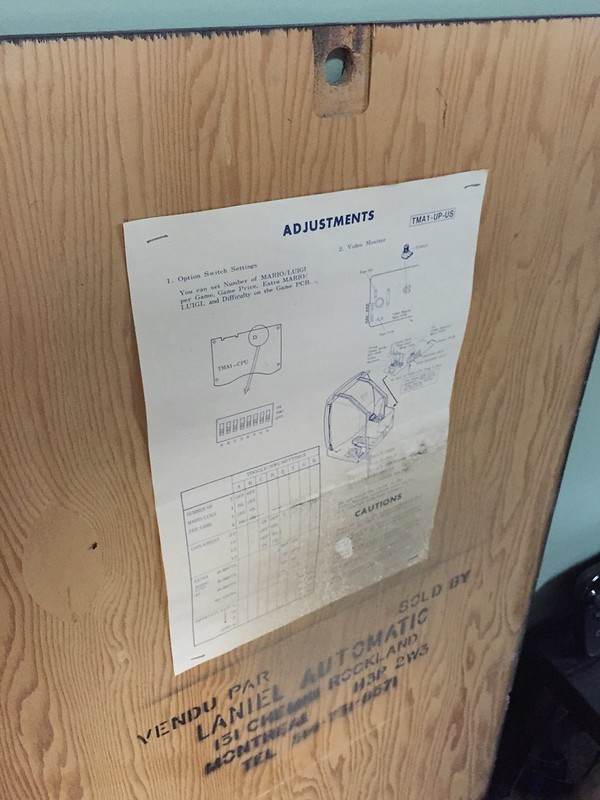
-The mint condition manual that came in plastic with the game :D
-Possibly you, the person reading this right now.


Current Roadblocks: 2015.Oct.07
-The impending Canadian Winter.
-The continuing drop of the Canadian Dollar ;)


Restoration Candidate:
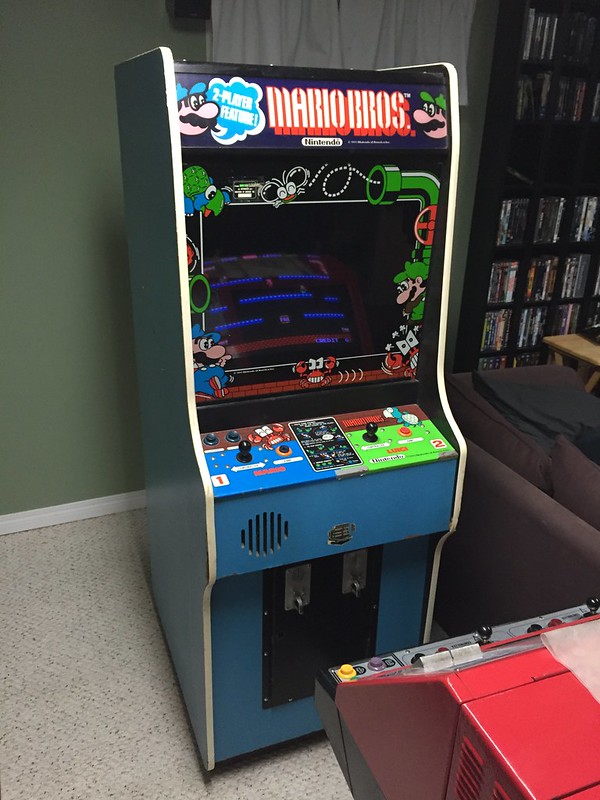
Lets take a look at what we have to work with.

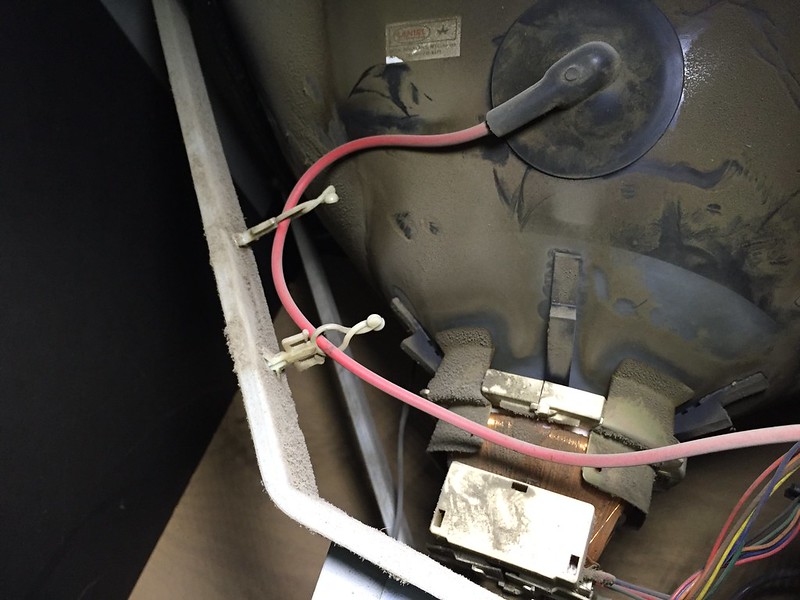
All in all, it looks pretty good. The cabinet has never seen a life outside of private ownership. I'm apparently the third owner, and theres now much wrong with this save from some cosmetic damage, to a little bit of Particle crumble on some of the side wall corners. Most of the original art and labels are intact, and the PCB had batteries in it, however they weren't leaking and the board is mint. Monitor wise, its rock solid. In fact its so good that theres no noticeable burn, and in the last ten years someone has performed a top shelf cap job on the chassis.

21774996450_66fe4f20ac_c.jpg


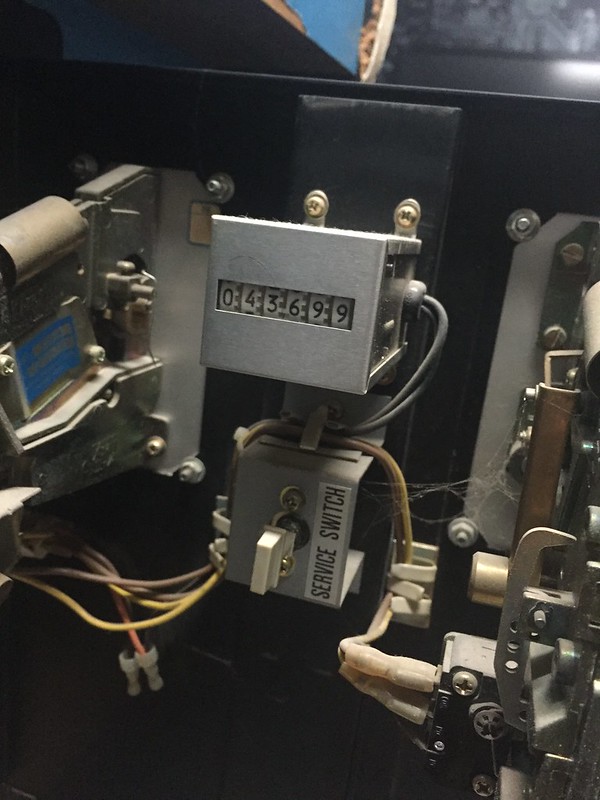
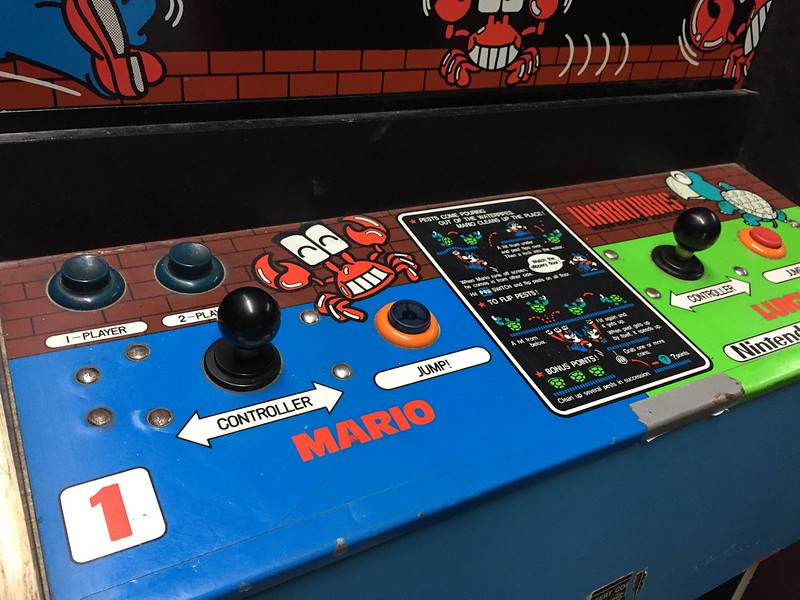
Looking a little deeper at the CP, we can see its missing the plungers for the orange buttons, there is some minor damage to the P1 button in the form of a small cig burn on the top, and the CPO needs replacement. Some small signs of rush on the bolts, and at some point the P1 button was wired into the left coin mech switch.

21986574525_1241577265_c.jpg


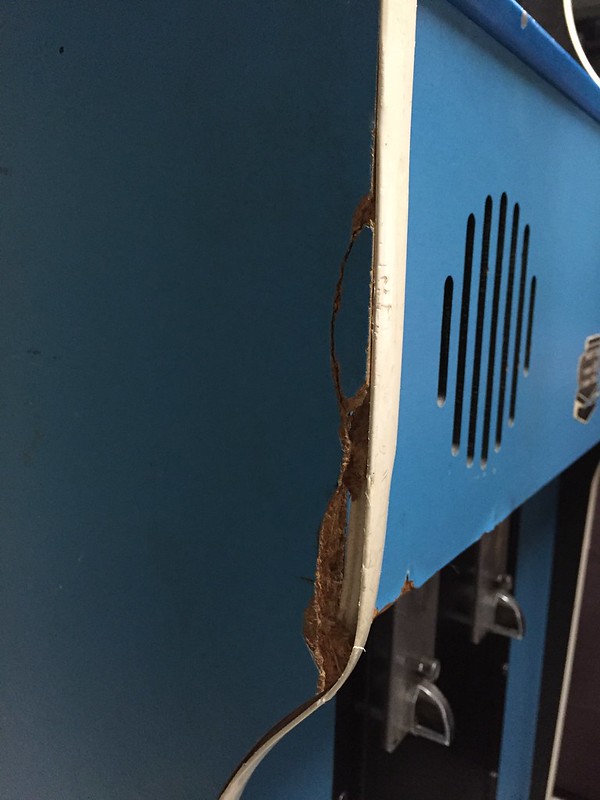
The majority of the physical damage to the cab is Particle wood crumble. The outcroppings are the worst, however the t-moulding is keeping the shape quite well. this will come in handy when it comes time to bondo these. One larger chunk of Particle board is loose, i'll be able to get a paint match off that.

21960385516_df535e2a50_c.jpg


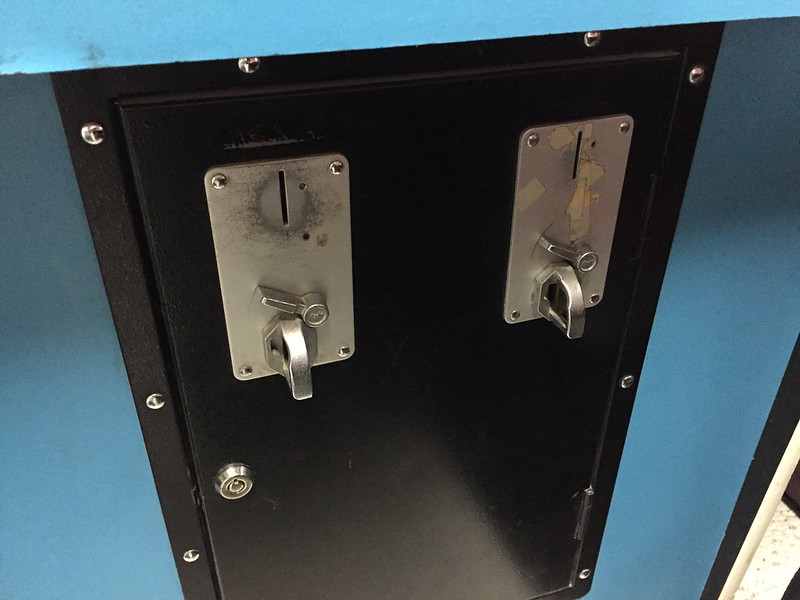
The coin door and marque brakes need a little love. I'm lucky that this coin door doesn't have any major damage to the outs from repeated kicks from vandals, however there are a few pry marks from the inside i'd like to address. The plexi brackets will need a good refinishing, as will the rest of the metal bits. Most of these will be powder coated rather then painted for durability. New coin mech faceplates, and a lock will also be on the menu.

21986572805_53e7caf70a_c.jpg


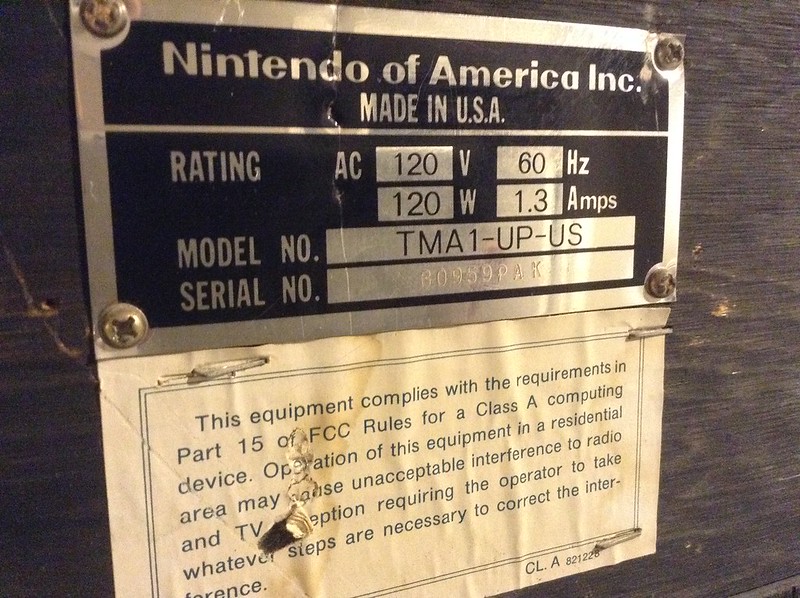
Some cosmetic damage to the back side of the cab. I'll be reproducing this sticker for my other build. If it comes out close enough to this original i'll consider replacing it.

21836513012_53f0e928c3_c.jpg
 
Last edited:
The back panel is pretty good as it is. the lock was removed without force by one of the previous owners, so no real damage on the back. a new lock will be required. And a good shot of paint for the outside will go a long way here. The Wheels are in decent shape, so i wont have to use my source in China to acquire new ones for this project.

21799669709_1db2c6e618_c.jpg


DUST! Lots of it. No rat shit, thankfully. lots of cobwebs, and that power cord needs to be the first thing to be replaced. The inside needs a full cleaning.

21799671589_2f470b848e_c.jpg


More cobwebs on the inside of the coin door. the coin counter is pretty high, every time you hit the P1 button it ticks over. So i can see why this value pretty much only tells me how many games have been played, and not the revenue generated.

21776172619_121b5ba592_c.jpg


The contents of the coin box. This will help with the restore costs. Who am i kidding i already burned that up in gas on my first trip to home depot to get supplies...

21950955192_ef285c213d_c.jpg


The monitor, FULL of dust. but as previously mentioned its in top shell condition. I'd like to maybe pull this before it gets too cold and at least wash it before sub zero weather hits. Also as mentioned above, cap kit has been done.

21960386486_3b98709436_c.jpg


Thats it for now. I'll try my best to document my progress as i go, i'm usually pretty good at snapping pictures as i work. but we'll see :) Hope you guys enjoy this project.
 
This will be a good one. Looks like you have got a great game to start with there, with all its original parts. Shouldn't be too bad.
 
I'll be following Chance!

Always wanted a Mario Bros cab so this is right up my alley.

I'm a little partial to the wide-body version tho. Good luck, you got some good guts to work with there.
 
MDF < Particle. FIXED! (Thanks John)


And thanks guys! I'll try to hold up my usual standards for anal retentive work, and large images. :cool:
 
Since it is particle board, were you so lucky to get off-set t-molding grooves?

Also, for only having 2 previous private owners...I'm sorta surprised it isn't in better shape.
 
Last edited:
Yes, the off-set was the worst of my fears, (Actually it was "finding a dead rodent inside" after the family i bought it from told me they hadn't opened it in 10 years as we unscrewed the drywall screws holding on the back panel.)

And yes, :( offset. BUT! John just did a tutorial on making offset with his Nintendo Vs. project. That was originally my backup plan anyways going in to get it.

Its a bit kicked around because it grew up with two pre-teen boys in rural Saskatchewan. When my brother and i were kids nothing was safe. We were why my parents didn't have nice things. :D
 
Oh man, so i just looked at the weather, and i might only get one good shot at washing this monitor before the cold weather really hits. This Thursday/Friday is gonna be 22ºC (...like 72º F... i think, rough guess). I doubt i'll get another good day like that.

Yikes.

...Maybe
 
Oh man, so i just looked at the weather, and i might only get one good shot at washing this monitor before the cold weather really hits. This Thursday/Friday is gonna be 22ºC (...like 72º F... i think, rough guess). I doubt i'll get another good day like that.

Yikes.

...Maybe

Crap dude...you are freaking me out right now. Weather can turn on a dime here in Colorado. I really need to wash and cap my DK monitor soon.
 
And yes, :( offset. BUT! John just did a tutorial on making offset with his Nintendo Vs. project. That was originally my backup plan anyways going in to get it.

Yea, I watched John's edge-trimming video and that is a very good back-up plan. But OCD guys like you and me need TRUE flat.

How are you even going to be able to look at yourself in the mirror unless it is TRUE flat?

:)
 
/Cries. :004_scry:

I don't know...


You know, i'm staring to think mine actually has trimmed molding on it. There were a number of suspicious marks and "flashing" on the shorter lip of what on there. This is totally going overboard with my examination of the cab, but i'm wondering if this stuff really even existed, or we've just all been duped by some American cab builder from the 80's with a trimmer in the Nintendo Factory. :004_ssleepy:

It WAS 3/4" that was trimmed. Anyone in the know knows. I've seen 3 Nintendo particle board cabs, all 3 had trimmed molding.
 
So why are we all batshit crazy for this custom made stuff? (No disrespect... seriously, i've had enough crazy idiot online Drama today)

I bet we can source those trimmers on Aliexpress.
 
So why are we all batshit crazy for this custom made stuff? (No disrespect... seriously, i've had enough crazy idiot online Drama today)

I bet we can source those trimmers on Aliexpress.

Most people around here have no idea what was original and just believe what they want to believe, evidence and common sense be damned. That being said, the edges on the stuff Bill sells look more finished than a trimmed edge does, so it's worth getting for that reason alone.
 
Following along as it appears I've found a Donkey Kong to love.

Most people around here have no idea what was original and just believe what they want to believe, evidence and common sense be damned. That being said, the edges on the stuff Bill sells look more finished than a trimmed edge does, so it's worth getting for that reason alone.

Who is Bill and can you please share a link?
 
Following along as it appears I've found a Donkey Kong to love.


Who is Bill and can you please share a link?

His username is Audiomidiman, but from the looks of his tru-flat thread, he is currently sold out of the offset stuff. He is asking for interest in doing another run, so post there.
 
Back
Top